
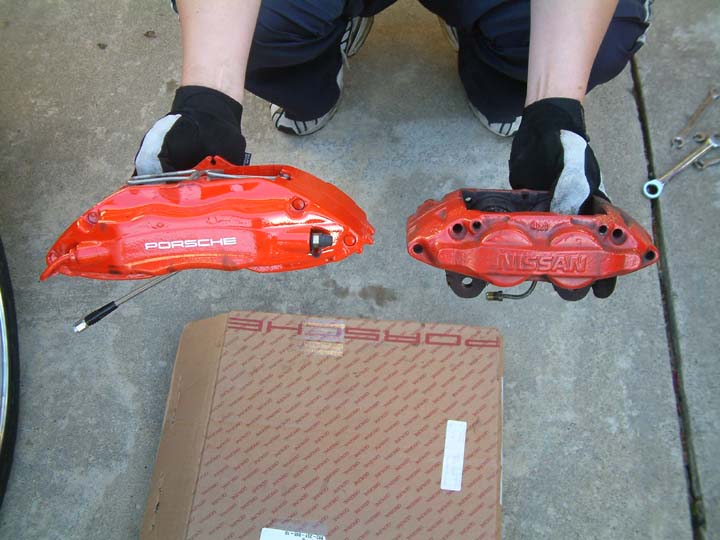
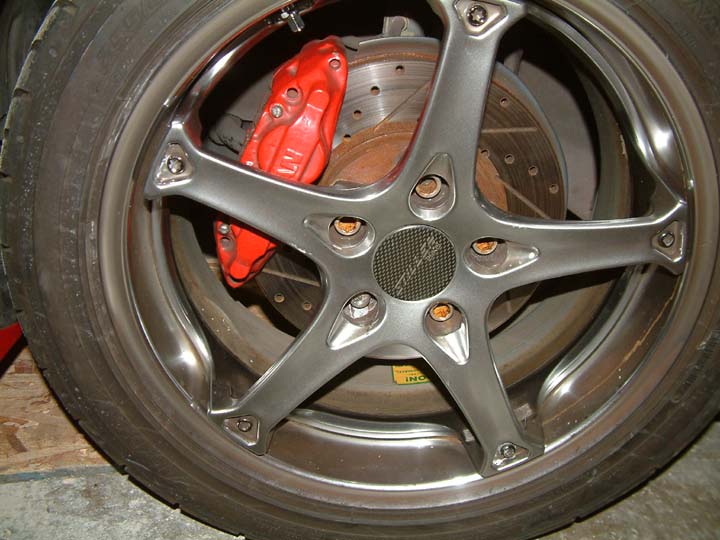
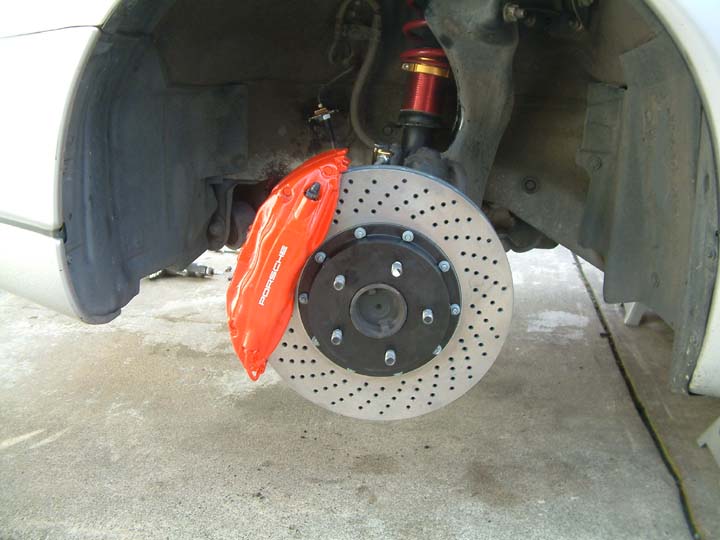
 Side by side
comparison of the stock Nissan four piston caliper and the Porsche 993 Twin
Turbo Big Red caliper.
Side by side
comparison of the stock Nissan four piston caliper and the Porsche 993 Twin
Turbo Big Red caliper.Created: 4/2/2005
Last updated: 4/2/2005
Well, the day has finally come. I installed my Porsche Big Reds with the help of Glenn and Kevin. If you are mechanically competent, you should be able to do this. I hope these instructions will help your install. These are the parts required for the upgrade (parts list courtesy of Glenn).
Porsche 993TT front
left caliper p/n 993.351.425.10
Porsche 993TT front right caliper p/n 993.351.426.10
Porsche 993TT front left rotor p/n 993.351.045.10
Porsche 993TT front right rotor p/n 993.351.046.10
Hawk HPS street pads p/n HB 184 HPS $100.00
Russell SS brake line adapters p/n 655012 (2x)
Endura 9" 90 deg -3 to straight -3 street legal (2x)
Russell fittings endura p/n 41431/641431 (4x)
#3 to 10mm -1.0 male fitting
Misc grade 8+ hardware
Custom caliper brackets (2x)
Custom rotor hats (2x)
Goodridge stainless steel brake lines or similar to replace the line going from the firewall to the clip closest to the brake caliper mounting point.
To install this
brake up grade, you will need the following items.
1) Safety Goggles.
2) Mechanics gloves.
3) Sawzall or other type of reciprocating electric saw with several bimetal
blades.
4) Socket wrench set with extensions.
5) Air compressor.
6) Air powered die grinder.
7) Air powered rotary grinder.
8) Impact wrench.
9) Philips and flat head screwdrivers as well as a large heavy duty flat
screwdriver to be used for prying.
10) Various flare nut wrenches, 10mm, 11mm, 12mm.
11) PB Blast spray, liquid wrench, or other similar chemical.
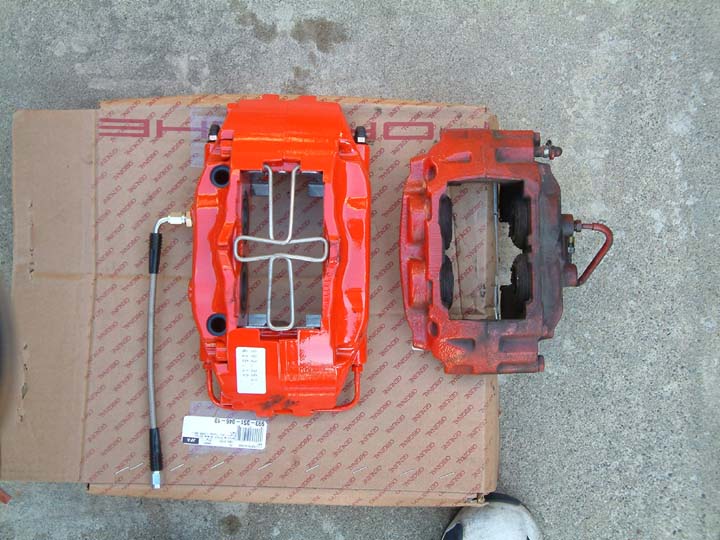
Side by side
comparison of the stock Nissan four piston caliper and the Porsche 993 Twin
Turbo Big Red caliper.
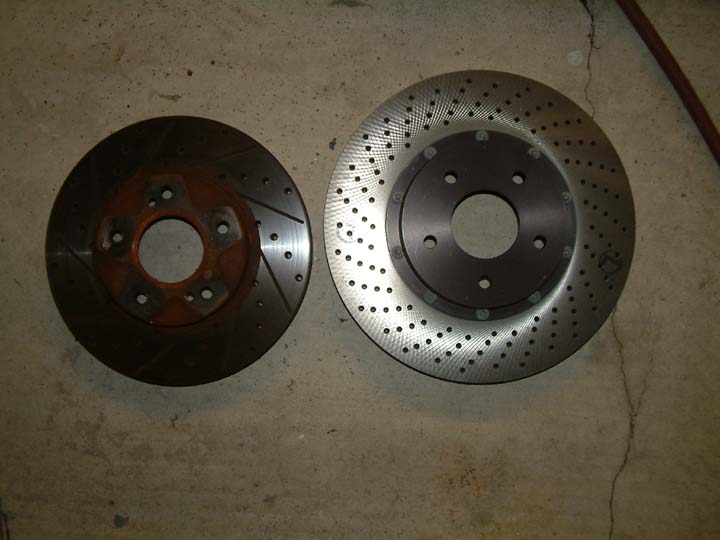
 Side by side
comparison of the rusted cross drilled and slotted stock sized Nissan rotor
versus the Porsche 993 Twin Turbo rotor.
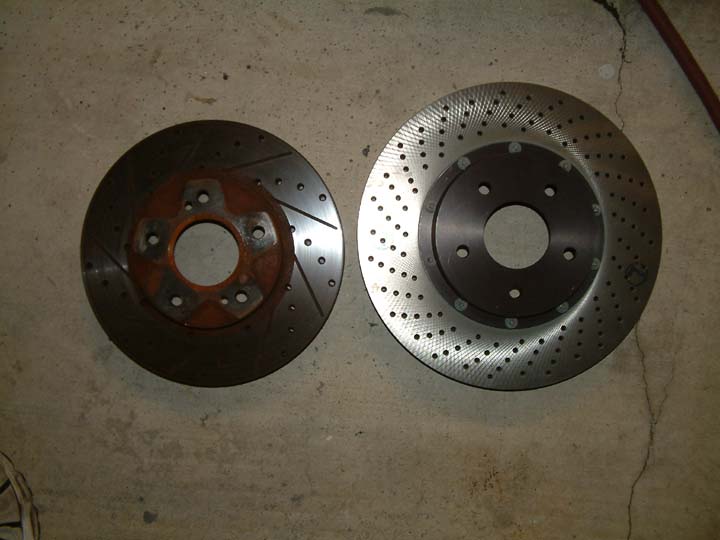
Side by side
comparison of the rusted cross drilled and slotted stock sized Nissan rotor
versus the Porsche 993 Twin Turbo rotor.
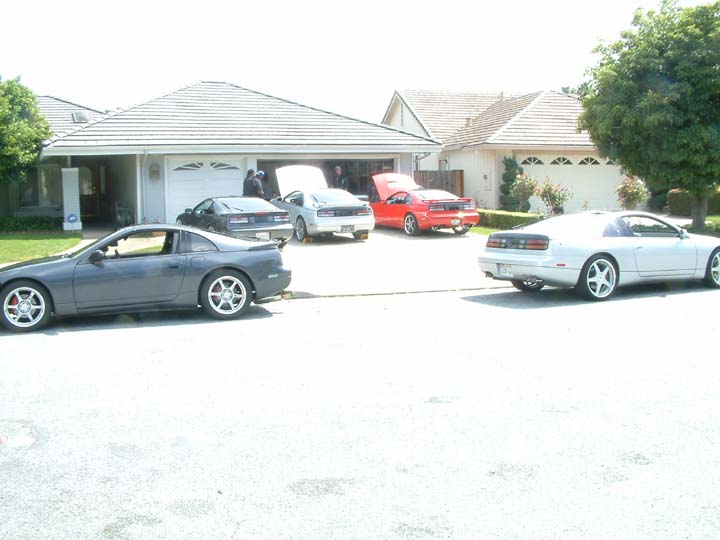
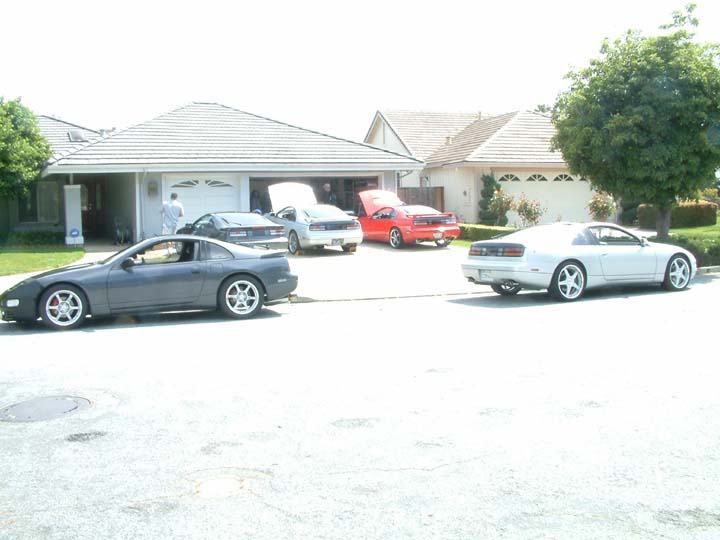
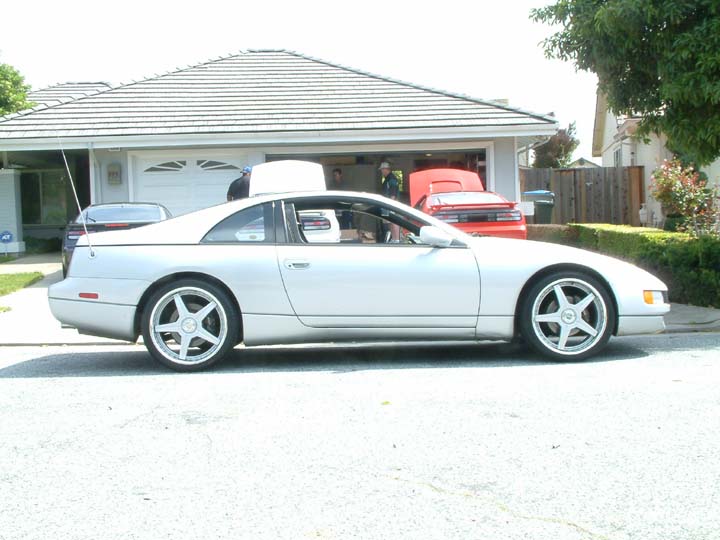 Some of the cars that
were at Glenn's house. You can see Kevin's TT, Glenn's TT, Chuck's TT, Salah's
NA with 19 inch wheels, and my TT.
Some of the cars that
were at Glenn's house. You can see Kevin's TT, Glenn's TT, Chuck's TT, Salah's
NA with 19 inch wheels, and my TT.
 My previous setup.
Stock TT calipers with poor quality cross drilled and slotted rotors that has
more rust than the Titanic.
My previous setup.
Stock TT calipers with poor quality cross drilled and slotted rotors that has
more rust than the Titanic.
 My rear brake setup
consisting of stock calipers and cheap cross drilled and slotted rotors with so
much rust, that you have to get a tetanus shot after looking at them.
My rear brake setup
consisting of stock calipers and cheap cross drilled and slotted rotors with so
much rust, that you have to get a tetanus shot after looking at them.
1) Make sure that you use wheel chocks on the rear wheels, jack up the car using a low profile floor jack on the front crossmember. Then, put two jackstands under both jack points next to the side framewells. Check the car to make sure it's stable and level.
2) Remove both front wheels.
3) Spray PB Blast on all brake line fittings and let them soak for 5-10 minutes.
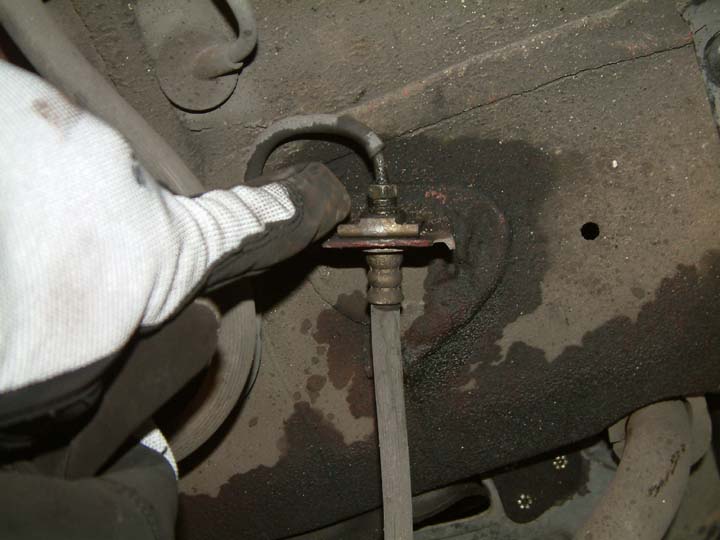
4) Turn the wheel all the way towards you so that you can reach the hardware behind the rotor. Remove the brake line connected to the stock caliper using the flare nut wrench. If it does not loosen with a reasonable amount of force, spray more PB Blast and let the fiting soak. You have to be careful to not strip or round out the fitting.
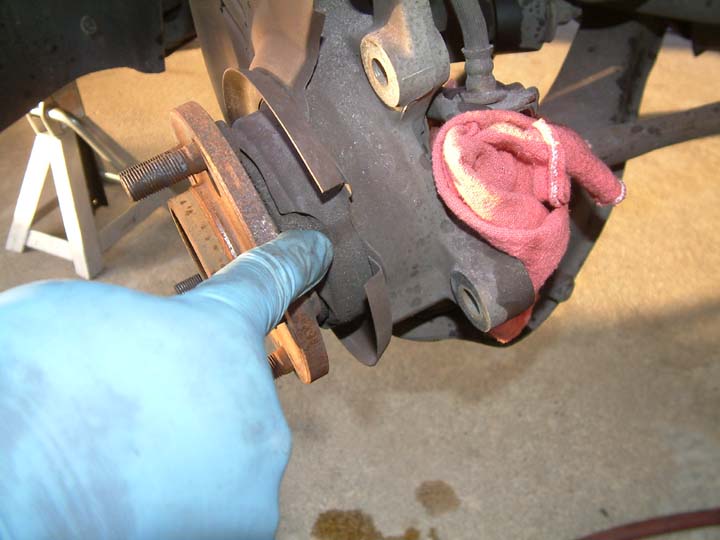
5) You should be able to remove the stock Nissan caliper by removing both mounting bolts behind the caliper. If you can't remove the caliper, then you'll have to remove the pads. It's secured in place by 2 long pins and a retaining clip.
 6) After your
remove the caliper, remove the brake line connected to the firewall and discard.
You should have a stainless steel line as a replacement.
6) After your
remove the caliper, remove the brake line connected to the firewall and discard.
You should have a stainless steel line as a replacement.
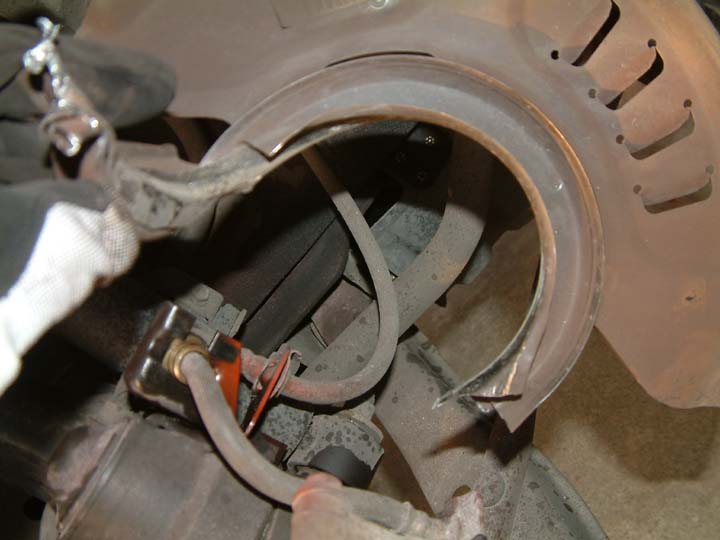
 7) Now, you'll have to
cut this dust shield off before you can fit the larger Porsche rotors. I used a
big screwdriver to pry part of it away from the hub and then I used a die
grinder to cut the dust shield. After it's been cut, I used a large set of
adjustable pliers to remove it from the hub.
7) Now, you'll have to
cut this dust shield off before you can fit the larger Porsche rotors. I used a
big screwdriver to pry part of it away from the hub and then I used a die
grinder to cut the dust shield. After it's been cut, I used a large set of
adjustable pliers to remove it from the hub.
 8) After successfully
prying the dust shield, you can carefully remove it from the front spindle.
8) After successfully
prying the dust shield, you can carefully remove it from the front spindle.
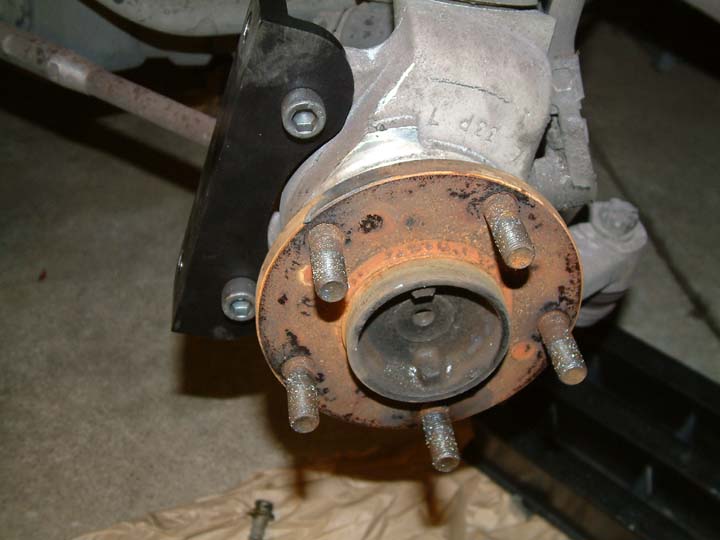
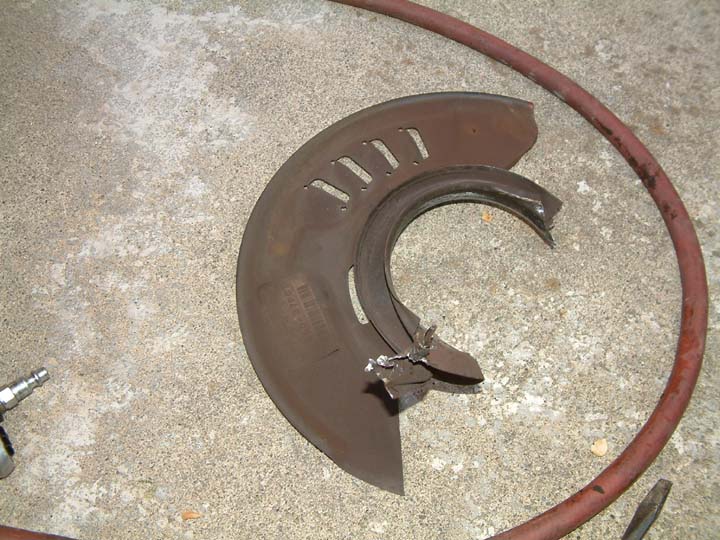 This is what the dust
shield looks like after you remove it. Discard it, you won't need it.
This is what the dust
shield looks like after you remove it. Discard it, you won't need it.
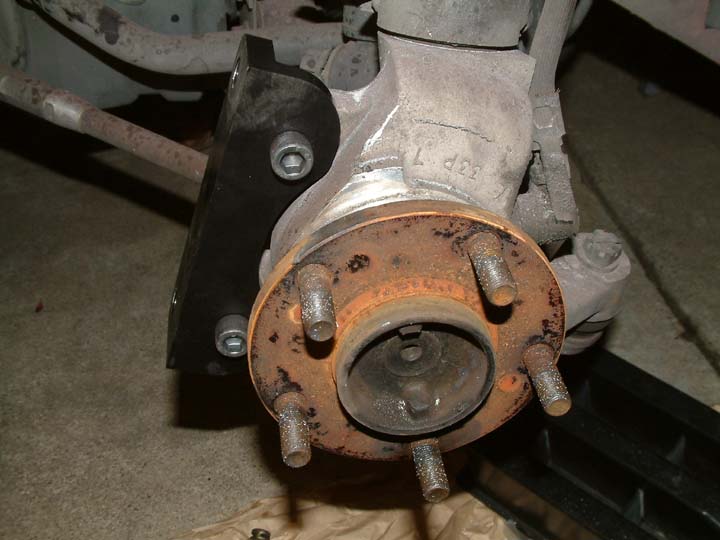
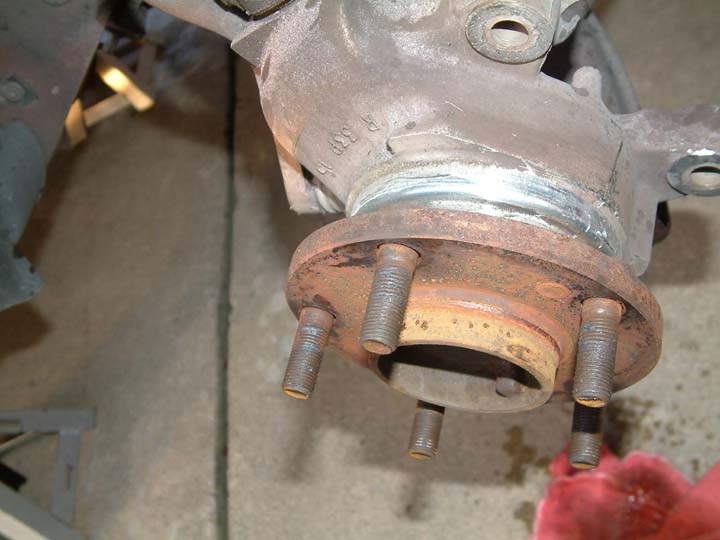 This is what the hub
looks like after you remove the dust shield.
This is what the hub
looks like after you remove the dust shield.
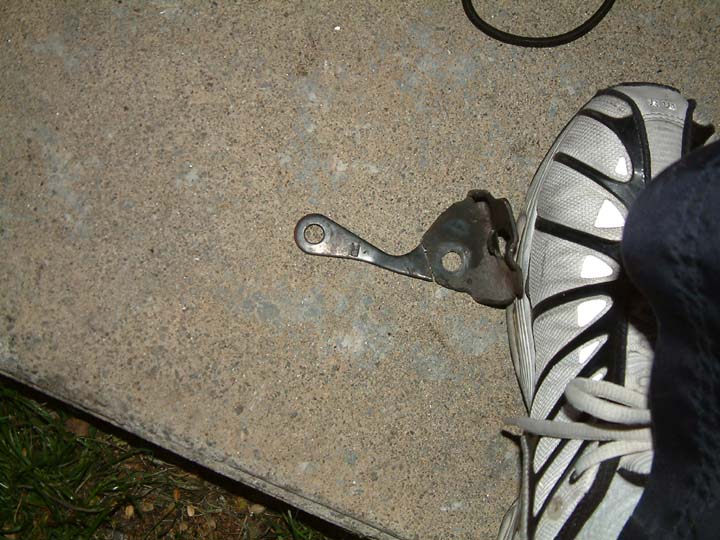
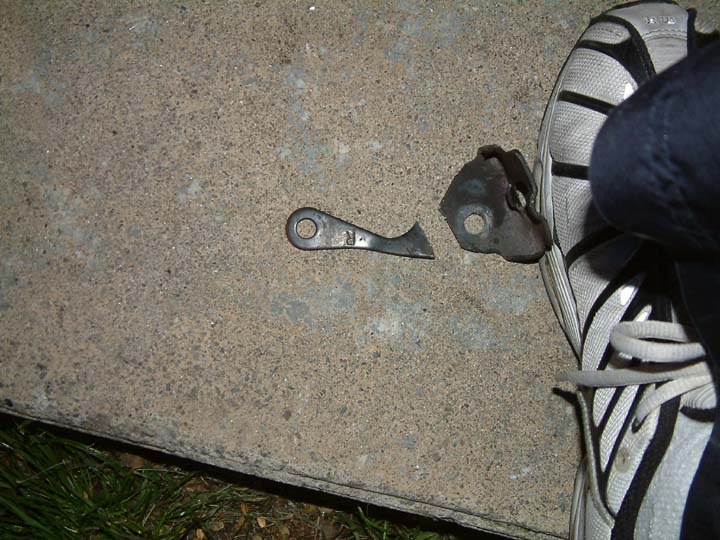 9) Remove this brake
line bracket from behind the rotor mounting bracket. You will have to modify it
by cutting off the piece as detailed above. Use a Sawzall or similar cutter and
hold the bracke with a bench vise or similar.
9) Remove this brake
line bracket from behind the rotor mounting bracket. You will have to modify it
by cutting off the piece as detailed above. Use a Sawzall or similar cutter and
hold the bracke with a bench vise or similar.
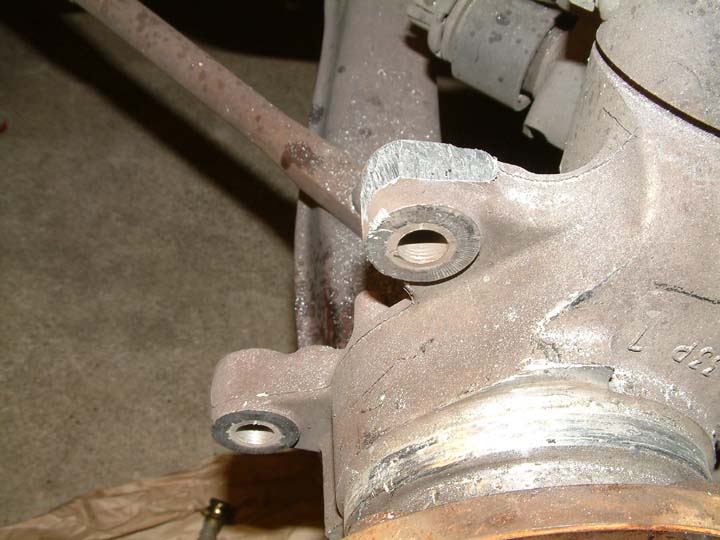
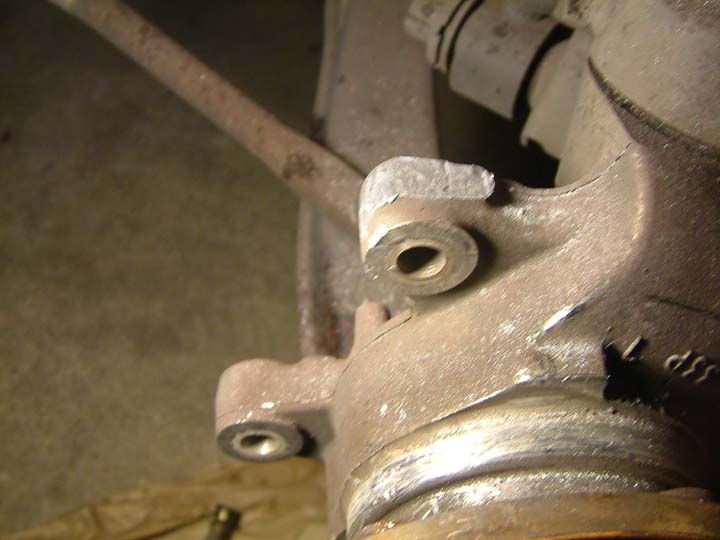
 10) The next thing
you'll have to do is cut the extra ear on the caliper mounting bracket. Draw an
imaginary straight line across and cut. I started the cut by making a dimple cut
with a die grinder and then completing the cut with a Sawzall. Make sure to wear
gloves and safety glasses. After making the cut, use a grinder to sand down the
bracket as shown above. You need to be able to fit the caliper mounting bracket.
10) The next thing
you'll have to do is cut the extra ear on the caliper mounting bracket. Draw an
imaginary straight line across and cut. I started the cut by making a dimple cut
with a die grinder and then completing the cut with a Sawzall. Make sure to wear
gloves and safety glasses. After making the cut, use a grinder to sand down the
bracket as shown above. You need to be able to fit the caliper mounting bracket.
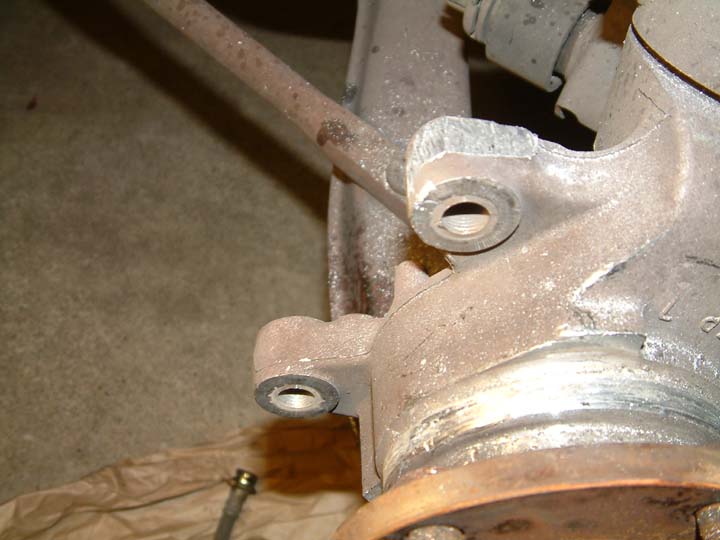
 11) If you have done
the above procedure properly, you will be able to mount the caliper bracket on
and fastened with the long allen bolt. Make sure that both bolts are tightened
as securely as possible.
11) If you have done
the above procedure properly, you will be able to mount the caliper bracket on
and fastened with the long allen bolt. Make sure that both bolts are tightened
as securely as possible.
12) Now, install the Porsche Rotor.
13) Install the Porsche caliper onto the bracket.
14) Connect the stainless steel brake line to the firewall and run it through the other 2 brake line brackets. Secure them with the clips.
15) Connect the stainless steel brake line from the caliper to the first brake line mounting point behind the caliper bracket.
16) Turn the wheel all the way to the right and then to the left observing to make sure that there are no kinks in both brake lines and no other clearance issues.
17) Tighten all brake line connecting points and make sure to double check the caliper bracket bolts and caliper mounting bolts for tightness.
18) Repeat the removal and install process for the other side.
19) Bleed the brakes. I started with the passenger side. You start with the nipple closest to you. Bleed three times, and check the fluid levels in the master cylinder. I used Motul RBF fluid. Now, bleed the brake line from the nipple furthest away from you three times. Repeat this same procedure for the driver's side. Move back to the passenger side and repeat the steps three times for each nipple and check for air bubbles. If there are no air bubbles in the line and the fluid is clear, repeat for the driver's side. Check for any fluid leaks.
20) Reinstall the front wheels and retorque the bolts to 85 pounds.
Congratulations, you are now done with the install. Remove the jackstands and lower the car back onto the ground. Take the car out for a roadtest and make sure that the car will stop. LOL. If it has, you will have to break in the pads. It will take some time to bed in the brakes. Just go easy for 500 miles. Easy braking and no panic stops if possible. You should definitely notice better brake feel almost immediately. I sure did. Now, I can see how these brakes do on the track. Muahahahaha!
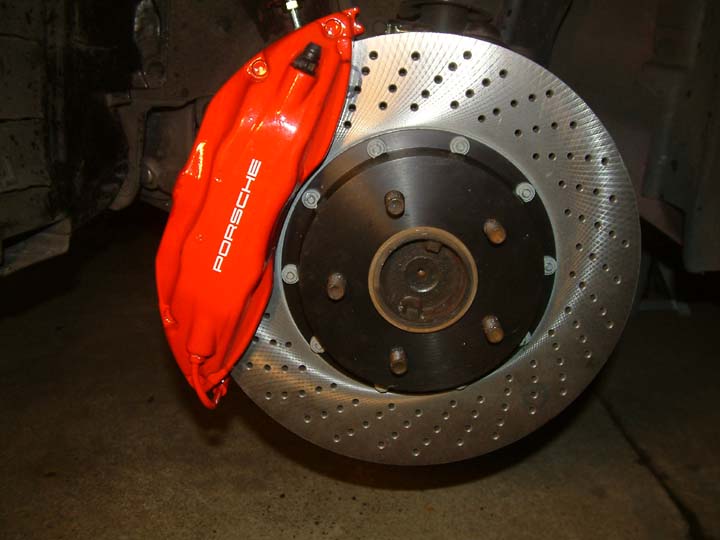
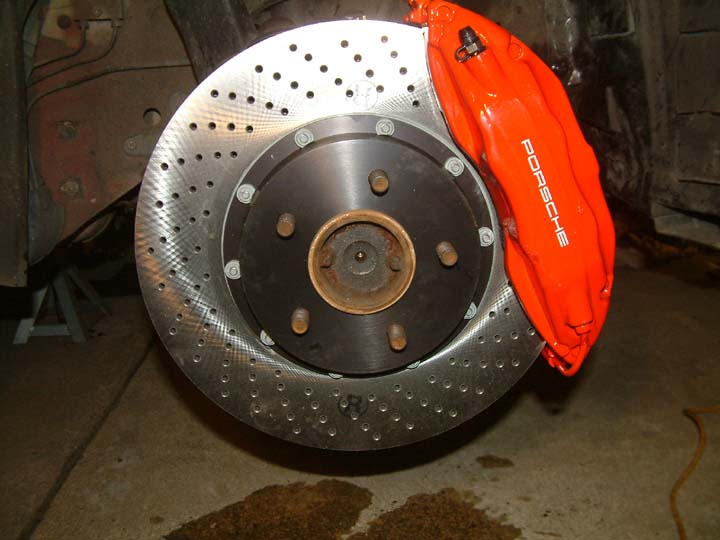
 Driver's side brakes
installed.
Driver's side brakes
installed.
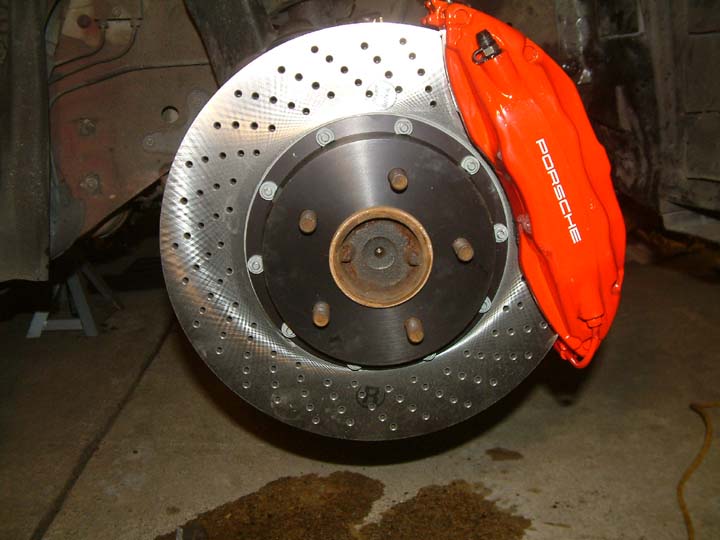 Passenger side brakes
installed.
Passenger side brakes
installed.
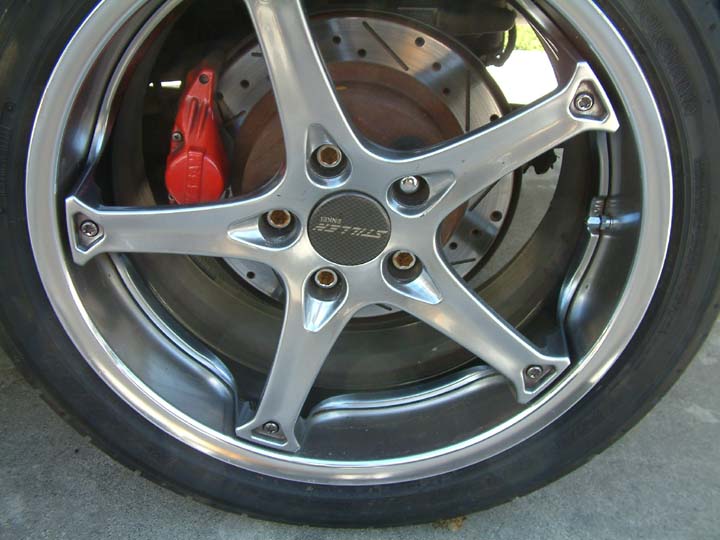
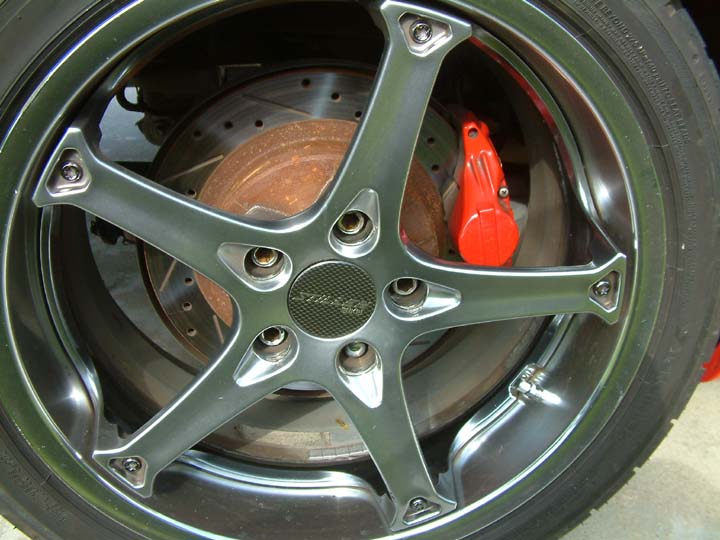
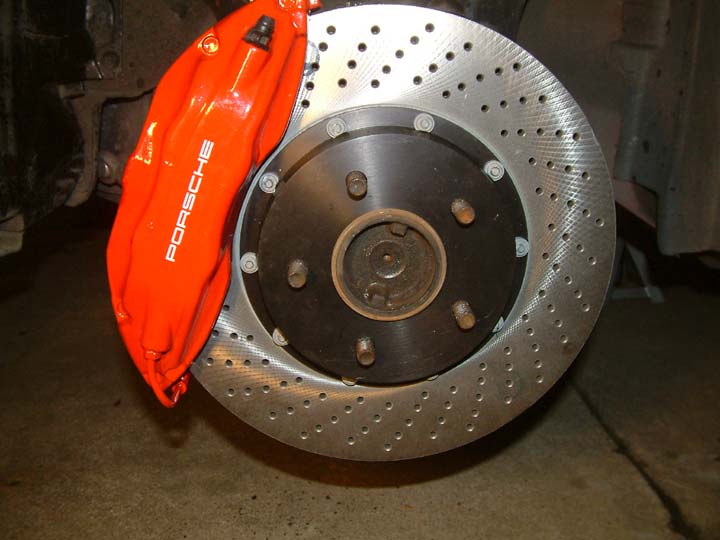
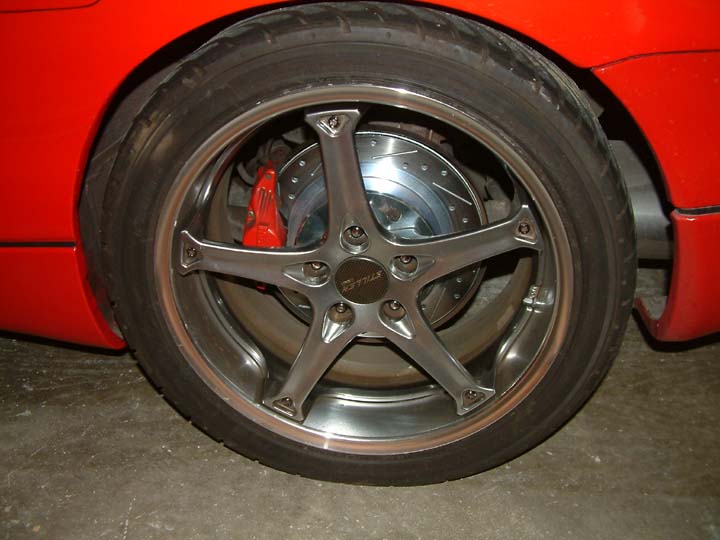
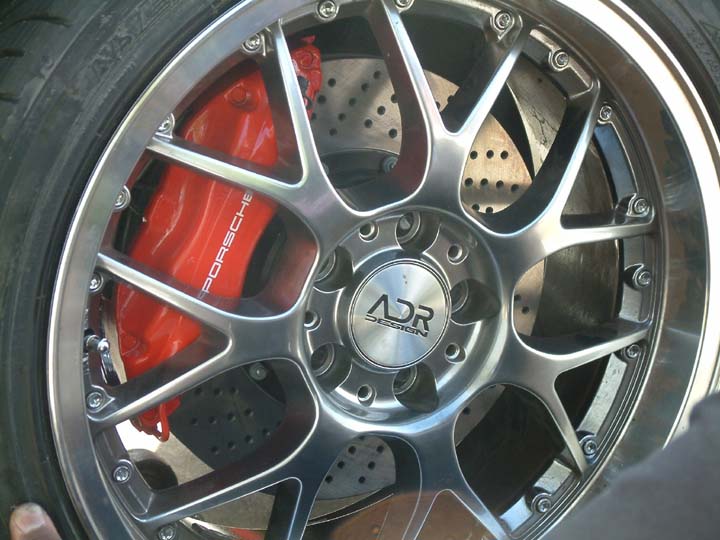
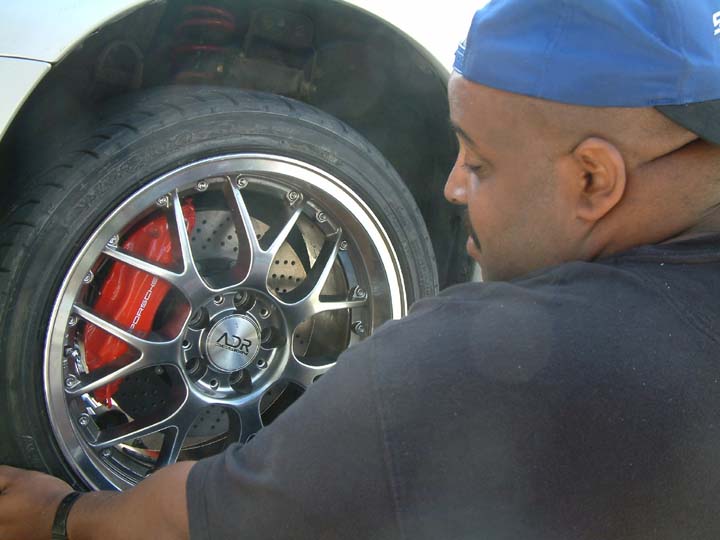
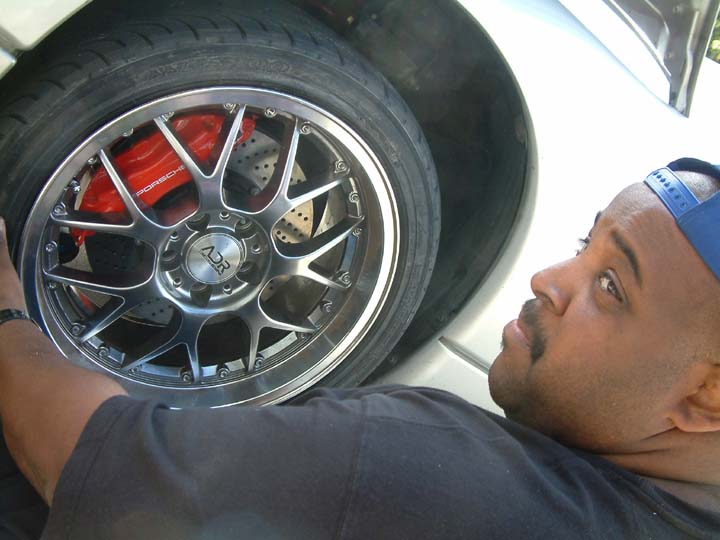
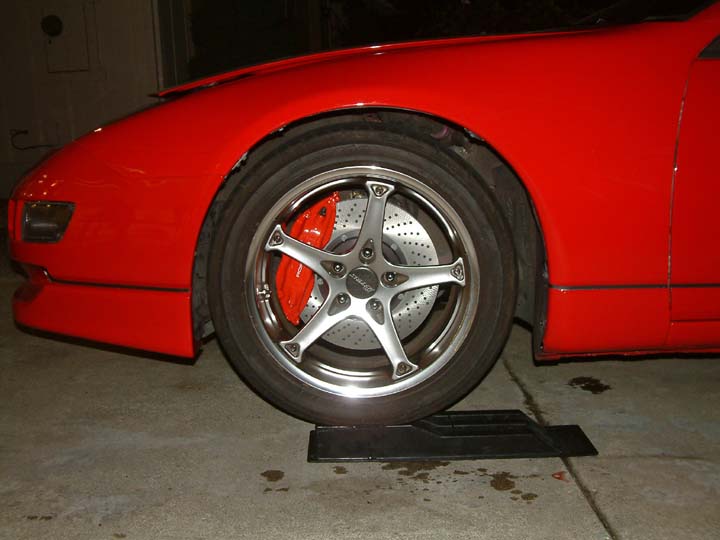 Install completed.
 Zinc plated slotted
and cross drilled Brembo rotors, courtesy of Coz at Concept Z Performance. No
more RUST! I made sure to change out my fronts and my rears today.
Zinc plated slotted
and cross drilled Brembo rotors, courtesy of Coz at Concept Z Performance. No
more RUST! I made sure to change out my fronts and my rears today.
 Kevin's Big Reds
installed.
Kevin's Big Reds
installed.
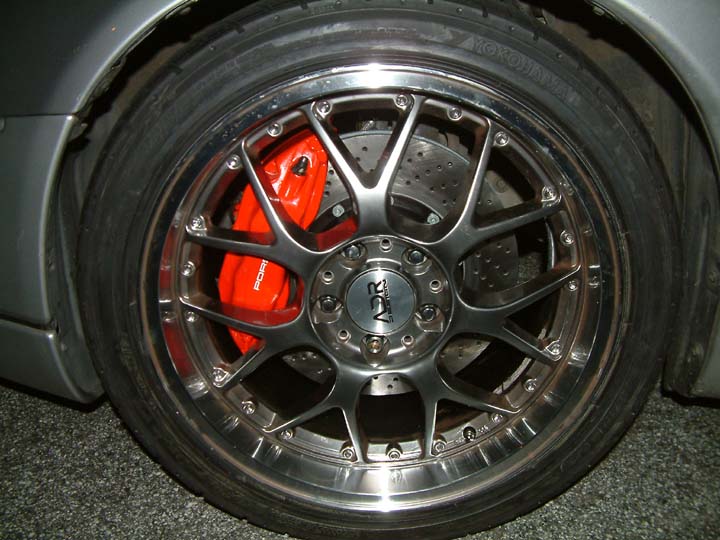
 Kevin's finished
product.
Kevin's finished
product.
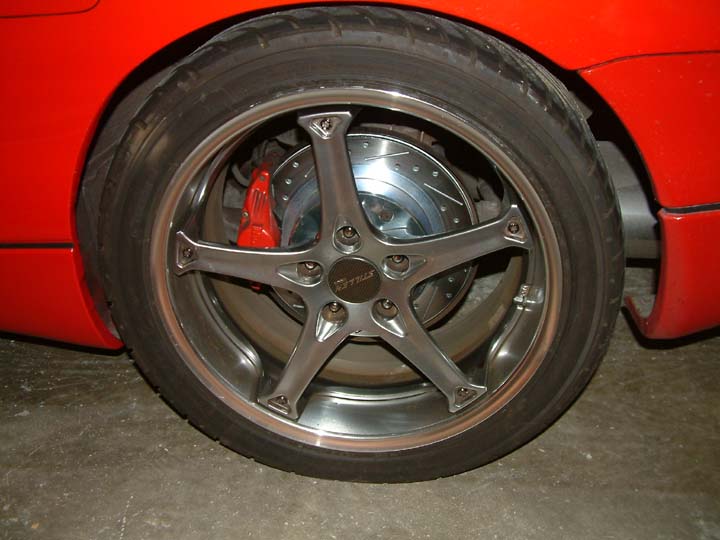
 The Big Daddy in
action. Definitely a job well done.
The Big Daddy in
action. Definitely a job well done.
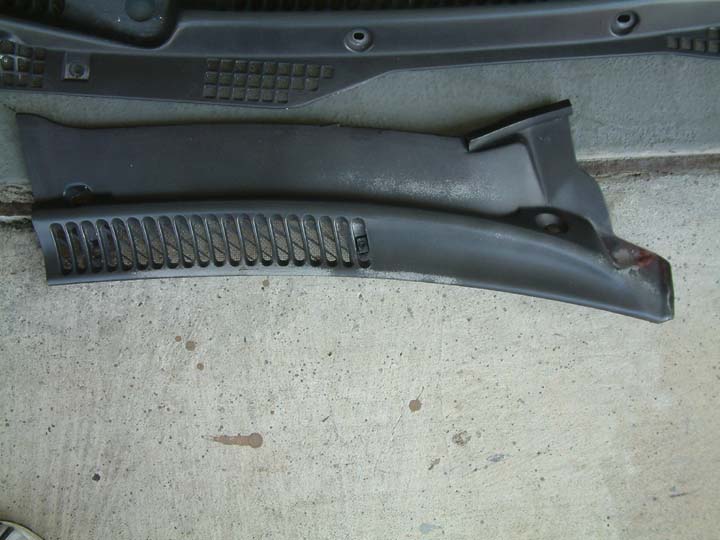

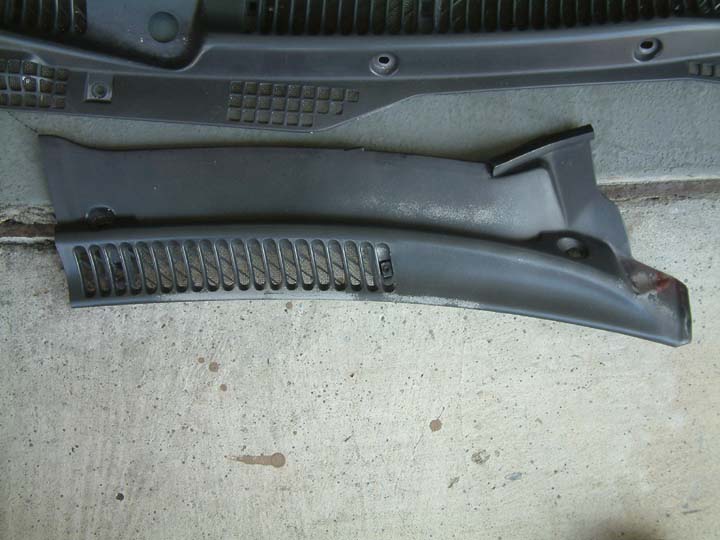
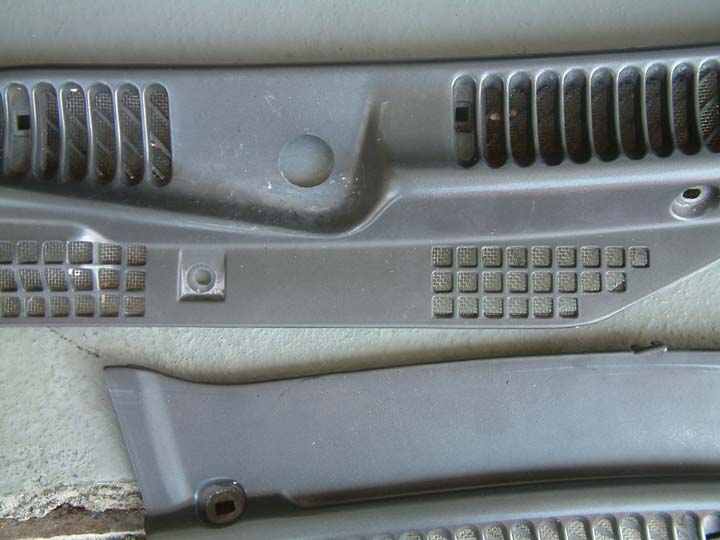
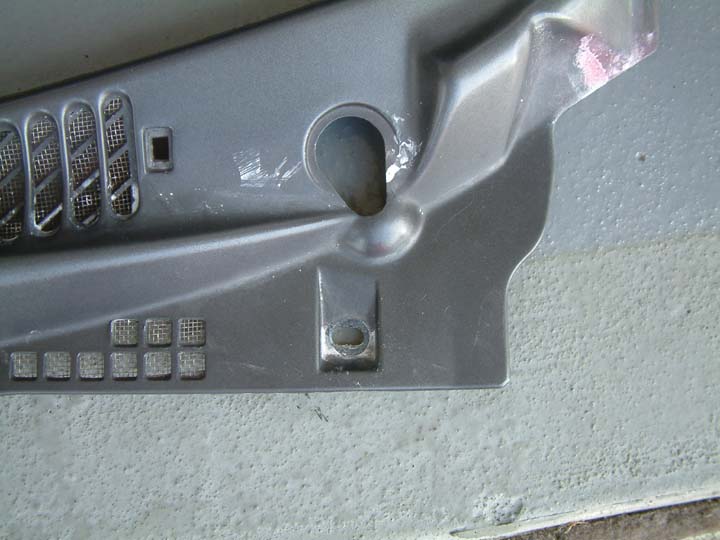 I also found time to
refinish my windshield cowling panels.
I also found time to
refinish my windshield cowling panels.
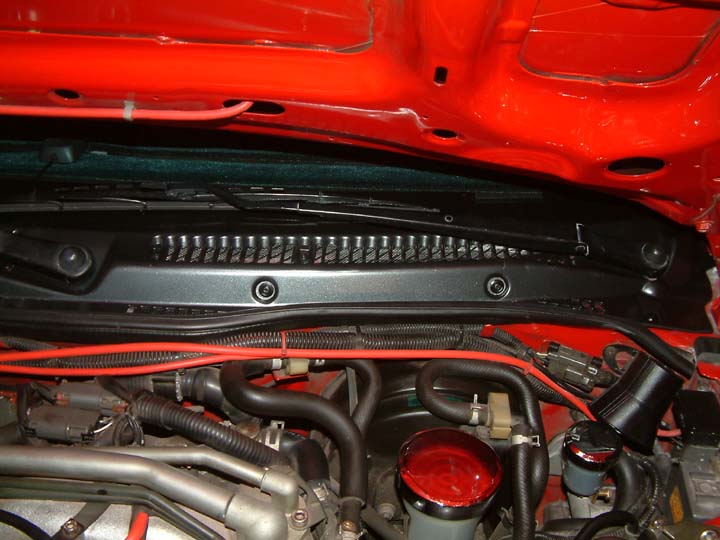

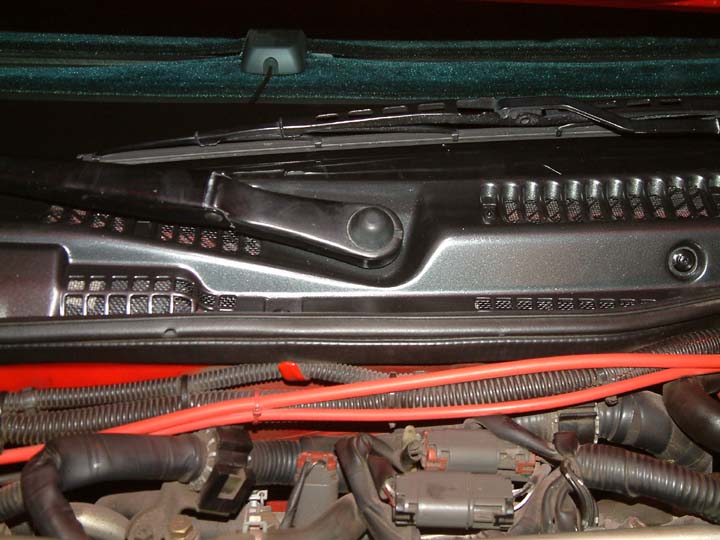 The finished product,
after sanding, priming, and painting. They came out nice IMHO.
The finished product,
after sanding, priming, and painting. They came out nice IMHO.
So, there you have it, a trackworthy, fade resistant brake package installed by a do-it yourselfer. If I can do it, so can you. I'll have more pictures of the cars and stuff. We were done around 10 PM so it was too dark to take any more pictures of the cars. Stay tuned to this channel. ;-) Thanks Glenn, Kev, and Roddy.... you guys rock.